New Media Centre Part 1
I’m building a new home media centre to sit in my living room and play video and music through my TV. Today the hardware for my media centre arrived from Ebuyer.
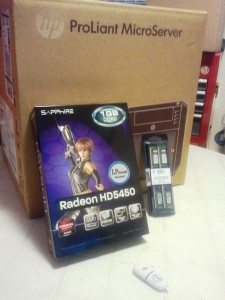
The server is a compact box fitted with a Turion processor and 250GB hard drive- plenty for my initial requirements, but it also has three additional hard drive slots should I require expansion in the future.
The graphics card features HDMI out for connecting to the TV (and will also work as a sound card in this respect) and has a large passive heatsink instead of a fan, which will hopefully keep the overall system noise to a minimum. Additionally, it comes with low-profile backplanes which are necessary to fit it into the Microserver case.
Also featured in the picture is a USB memory stick which I have pre-loaded with the XBMCbuntu installer which is going to be the operating system of the completed unit. The media was created using the great instructions on the XBMC wiki.
The first step after unpacking the boxes was to open up the server and fit the graphics card and replace the memory. Not having come across one of these Microservers before I found the HP website an invaluable source of info on how to dismantle the case.
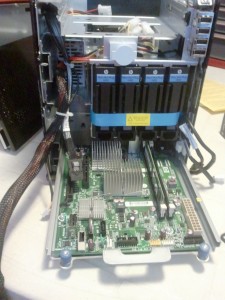
Having opened the front of the unit and disconnected some cables, the motherboard slides out allowing access to the PCI and memory slots. HP include a useful torx alan key clipped to the inside of the door for undoing the necessary screws.
Here I removed the full height backplane from the new graphics card and fitted the two half-height ones. One has DVI and HDMI and the second has VGA. Although the VGA is optional I don’t have anything else to fill the second slot on the motherboard so I left it in place.
The 2GB DIMM was removed and replaced with 2 4GB DIMMs. Although I’m not expecting this box to eat 8GB in it’s current role it made sense to upgrade all the way now rather than needing more RAM and not having it later.
I then slid the motherboard back in, making sure the backplanes of the graphics card went into the appropriate gap in the rear of the case- this was a little tricky with the free-floating VGA one but a bit of patience and use of my little finger got it into place.
The door and lid of the case then went back on and then it was all ready to power up and install the operating system…….. (continued in part 2)