Azure: Deploy a WebApp with PowerShell
A quick run through using PowerShell to deploy a new WebApp. ASP.NET code for the website has been zipped up (into myapp.zip) and this code snippet will upload it to a new WebApp, hosted in a new App Service Plan and a new Resource Group.
From a local PowerShell session use Connect-AZAccount before running this code to sign-in to Azure. Alternatively this code can be run (with the exception of the upload itself) from the Cloud Shell directly in the Azure Portal.
The code also writes out the URL of the resulting WebApp and the PowerShell necessary to tear down the resources when they are no longer required.
 1#Set some parameters
 2$location="UK South"
 3$resourceGroupName= "rsg-myapp"
 4$webAppName="web-myapp"
 5$appServicePlanName="asp-myapp"
 6$codeZIPPath="C:\myapp.zip"
 7
 8#Create Resource Group
 9"-- Creating Resource Group"
10New-AzResourceGroup -Location $location -Name $resourceGroupName
11
12#Create ServicePlan
13"-- Creating Service Plan"
14New-AzAppServicePlan -ResourceGroupName $resourceGroupName -Name $appServicePlanName -Location $location -Tier Free
15
16#Create Web App
17"-- Creating Web App"
18New-AzWebApp -ResourceGroupName $resourceGroupName -Name $webAppName -Location $location -AppServicePlan $appServicePlanName
19
20#Upload the web code
21"-- Uploading Web App Code"
22Publish-AzWebApp -ResourceGroupName $resourceGroupName -Name $webAppName -ArchivePath $codeZIPPath –Force
23
24#Show user code to destroy this (useful for testing)
25# and the website that has been created.
26"-- Tidy Up Code: "
27" Remove-AzResourceGroup -Name $resourceGroupName"
28"-- Website: "
29"-- https://$WebAppName.azurewebsites.net"
30
31"-- Done"
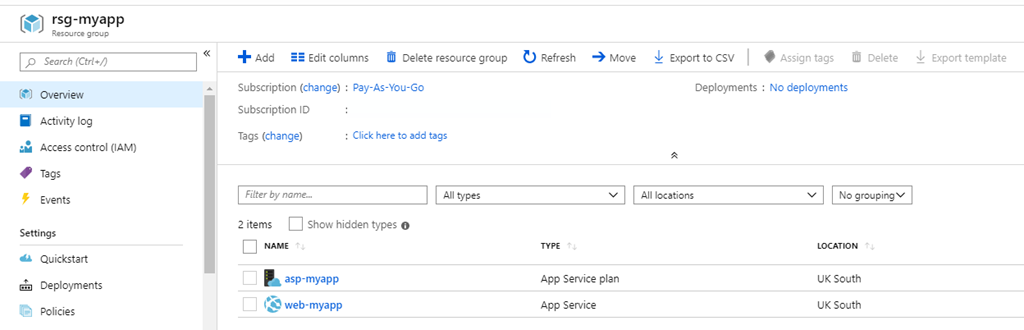
The resulting website can be viewed just by pointing a browser at the given URL. The created resources can be checked in the Azure portal: