Have you ever thought you had accidentally deleted a VM, or removed a production resource when you thought you were working in the test environment? Azure Locks are for you!
What are Azure Locks?
There are two types of Azure Resource Locks: ReadOnly and DoNotDelete and their names are fairly self explanatory. A VM with a DoNotDelete lock on it cannot be deleted, or the properties of a storage account
cannot be modified if it has a ReadOnly lock applied. Locks can apply to resources, resource groups, or even subscriptions- and are inherited down the management tree.
Whilst Role-based access control (RBAC) usually governs who can edit or delete resources, the locks sit on top of that architecture. Therefore even a user with the “Owner” role on a VM cannot delete it without
first removing the DoNotDelete lock. This is extremely useful in preventing accidental deletion either through clicking on the wrong button in the portal, or a piece of code referencing the wrong resource.
Locks are free and you can have as many as you like* so why wouldn’t you want to use locks on every resource group, or at least every one in Production? Well, locks can break things. Whilst there are situations where the ReadOnly lock
is well suited it might have unintended side effects. For example a read-only lock will prevent VMs from being started/restarted or an Application Gateway from checking it’s backend health.
A DoNotDelete lock on a backup resource group (AzureBackupRG_eastus_01 for example) can stop VM backups working.
When you have applied locks correctly, there’s an additional step of removing and recreating them when work needs to be done- for example when a VM does need to be deleted. Usually this isn’t
onerous and the extra work is outweighed by the benefits, but there may be exceptions to this. It’s also worth noting that sometimes an error message may not point to the lock being the cause, which
can lead to a bit of head-scratching!
Locks can be added at deployment time using the Portal, ARM Templates, PowerShell or whatever else you use to deploy resources. If your environment isn’t completely managed by a CI/CD pipeline it may also be prudent to periodically check for missing locks -
for example with a daily automation task to find any Resource Groups without a lock and apply a DoNotDelete lock to those groups. This will sweep up those occurrences where someone has unlocked a resource to work on it but not recreated the lock afterwards.
How can I create a Lock?
To create or delete a lock you need to have the correct permissions. This means your account must be assigned to either the Owner or User Access Administrator role, or a custom role which includes
the Microsoft.Authorization/locks/* actions in it’s permission list.
Portal
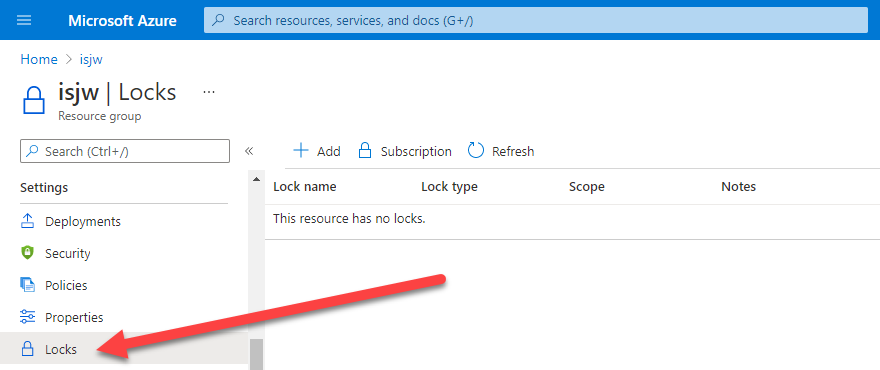
The first step is to locate the Subscription, Resource Group, or Resource to apply the new Lock to and open the Locks blade under Settings in the menu.
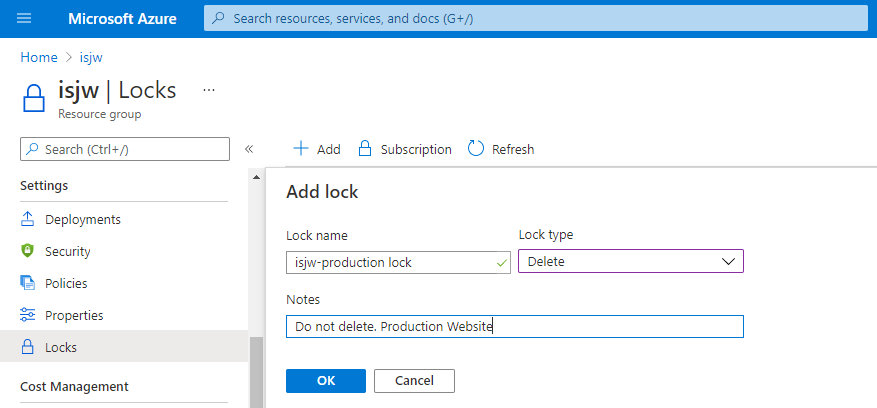
Then click on the Add button on the toolbar, enter the details of the lock, and click OK.
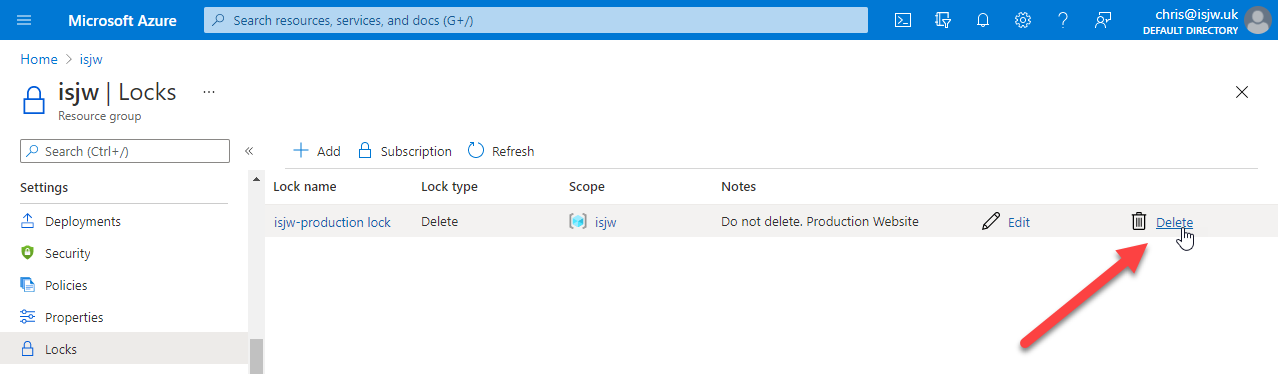
When it’s necessary to disable the lock, for example to delete a VM which is no longer required, delete the lock from this blade and then recreate it when the work is complete.
PowerShell
To create the same lock in PowerShell make use of the New-AzResourceLock cmdlet.
1New-AzResourceLock -LockName "isjw-production lock" `
2  -LockLevel CanNotDelete `
3  -ResourceGroupName "isjw" `
4  -LockNotes "Do not delete. Production Website."